If you’re a renter who has just tucked your power-sucking electric heater under the bed for another year, spring is the time to acknowledge that life can’t go on like this. Warming a house without breaking the budget (or spewing endless carbon emissions) takes forethought, and we’ve got the handy hints to help you.

1. Mind the gaps: Your first step is cheap and easy. Begin by sealing up the gaps below doors and around windows. Door snakes can be bought cheaply from hardware stores or discount shops and will keep the heat where you want it. The tape for sealing doors and windows is also surprisingly cheap (about $3 a packet — get it from a hardware store) and will suit some, not all, situations. Don’t forget to block off the air vents found in old houses, and any disused fireplaces. Both structures silently suck warm air out of the room, making any efforts to heat the place a waste of time. We sealed vents with clear contact for just a few dollars and stuffed the disused fireplace with balls of old newspaper, making an instant difference to the warmth of the bedroom.
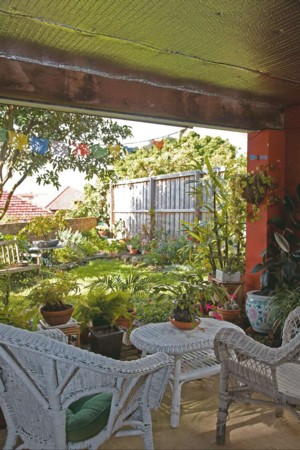
2. Curtains: Rental houses usually come with hopeless curtains, a sad fact given this is how to most easily make your house warmer in winter, or cooler in summer. Buying curtains can blow a renter’s budget in a second, so be vigilant in looking for sales, or buying second-hand at op shops or on eBay, which has surprisingly good options. The thicker the better, and try to hang them quite tight against the window for improved results. We spent $279 on four sets of IKEA curtains to cover two sets of sliding glass doors in this oversized lounge room. Curtains are virtually useless without pelmets, the old-fashioned “caps” fitted above the top of a curtain rod. Pelmets literally catch the hot air you have generated in a room and push it back down to where you can feel it. Pelmets are very effective and the good news is, you can make them out of almost anything if you’re not concerned about aesthetics. We know renters who have used cardboard and it worked well. We chose a cheap handyman (thanks to www.gumtree.com. au) who, for $30 an hour, built pelmets out of pine and even bought the materials, saving a trip to the hardware. We painted them ourselves for a better look. Total cost: $50 for materials and $60 for labour.
3. Cheap and cheery: When presented with the challenge to make this lounge room even warmer after curtains, pelmets and insulation had been put in, Gavin Scott went creative: “Put small drums of water near a window where they will warm during the day. They will store the latent heat and radiate it back out during the evening. The more mass you can get, the more heat you can store, but be very careful about the weight of the water. It’s really heavy and you don’t want it to fall through the floor.” Total cost: Nil, assuming you have an old vessel you’d like to use. If not, pick up something cheap at a garage sale.
4. Insulation: The $1000 rebate to landlords for insulation of rental houses is great news for tenants, but unfortunately it’s only applicable to roofs, not under floors. Insulating the roof will give you the best results for warmth in winter and cool in summer, but in a house like this one, where there are gaps between the floorboards, the wind whistles up into the space day and night. We went for a product called PERM IFLOOR , by Aircell. This underfloor insulation is quick and easy to install and is unaffected by moisture. It looks good and, at about $300 for a large (38m²) space like this one, is a good long-term solution (and superb option for homeowners). If you can’t convince your landlord of the same, you could consider nailing polystyrene under the floor joists instead for virtually no cost (free if you can convince your local supermarket to give you all their old boxes to cut up). In his information-dense book, Making Your Home Sustainable (Scribe Publications), retrofitting expert Derek Wrigley notes that even stuffed newspaper will do the insulation trick and that wire netting can be used to hold it all in place.
5. Double glazing: Double glazing for renters? Amazing, but true. ClearComfort insulating membrane is perfect for renters as well as homeowners on a tight budget. For $180.50 you get a ClearComfort Super Kit, complete with 10m x 1.6m of membrane, double-sided tape (the temporary stuff lasts six months to a year, while the permanent tape will see you through five seasons) and the all-important instructions. The plastic membrane sits about 10mm off the window to create a gap where air becomes trapped, so you do need the right kind of windows to use ClearComfort. Their website (www.clearcomfort.com.au) will give you enough information to determine whether this will work for your house. While our novice handyperson was daunted by the concept, she quickly became entranced by the ingenious nature of this solution. If you follow the instructions correctly, the result is virtually invisible. After a couple of trial runs, anyone can “double glaze” their windows cheaply in this way. Fabulous.
6. Double check those gaps: By now, you’ll be inspired by your success, so check the house again and seal any extra gaps. We asked our handyman to shave the top of a door that wouldn’t close, meaning we could keep heat in the parts of the house where we wanted to. We also got vigilant with floor rugs, putting them over as many floorboards as possible for the winter season.
The cost:
All of the above can be done for about $1000. But if you make your own pelmets, get a bargain set of curtains (or extra floor rugs) from an op shop, garage sale, or eBay, and DIY floor insulation (or take up the roof installation rebate available from the government), you could do everything above for about $500. While you may not be able to guarantee how long you stay in the house, by taking up our rental retrofit suggestions you’ll benefit from a far more comfortable (and greener) living environment while you do.


